
How to Use Before-and-After Photos to Attract Clients
Construction is a visual industry. You can talk for hours about “compressive strength” and “thermal conductivity,” but nothing sells a job faster than a stunning photo. The human brain processes visuals 60,000 times faster than text. In the digital age, your portfolio is your most powerful salesperson.
However, most contractors are terrible at documenting their work. They take blurry photos of messy sites, dark corners, or half-finished walls. These photos actually hurt your brand. At Kanish Plasters, we train our partners to treat every site like a photoshoot. This guide teaches you the art of “Visual Evidence”—how to capture, curate, and distribute Before-and-After photos that turn scrollers into paying clients.
1. The Psychology of Transformation
Why do “Before and After” photos work so well? Because they tell a story of Order from Chaos.
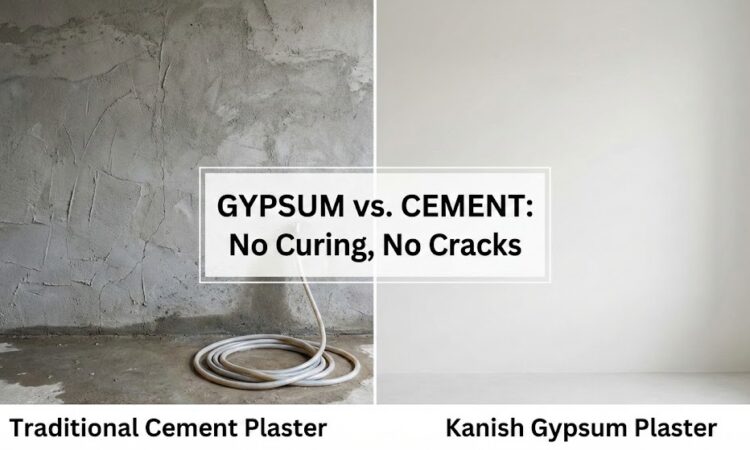
- The “Before” Photo: Shows the pain. Rough red bricks, messy mortar joints, dark grey cement, electrical wires hanging out. It triggers anxiety in the viewer: “Building is messy.”
- The “After” Photo: Shows the solution. Pure white, smooth, clean, bright walls. It triggers relief and desire: “I want my home to look like that.”
- The Gap: You are positioning yourself as the magician who bridges that gap. The greater the contrast between the ugly Before and the beautiful After, the more skilled you appear.
2. How to Take the Perfect Shot
You don’t need a DSLR camera. A modern smartphone is enough if you follow these rules:
- The Fixed Angle Rule: This is critical. Take the “After” photo from the exact same spot and angle as the “Before” photo. If the Before shot is from the doorway looking left, the After shot must be too. This makes the comparison instant and impactful. Use a floor tile mark to remember where you stood.
- Lighting is Everything: Never take photos at night with a flash (it looks harsh and cheap). Take photos in the morning or afternoon when natural light floods the room. Open the windows. White gypsum reflects light beautifully—capture that glow.
- Staging the Scene: Before clicking “After,” spend 5 minutes cleaning. Remove the ladder, the empty bags, the broom, and the water bottles. A clean floor suggests a professional job. A messy floor suggests a messy contractor.
3. What to Capture (Beyond the Wall)
Don’t just photograph plain walls. Photograph details that prove technical competence.
- The “Corner” Shot: Close-up of a sharp 90-degree external corner with a corner bead. This screams “Precision.”
- The “Light” Shot: A photo looking down a long corridor with light grazing the wall, showing zero undulations. This proves “Level 5 Finish.”
- The “Clean Edge” Shot: Where the plaster meets the door frame or the window. Show that there are no gaps or messy overlaps.
4. Distribution Strategy: Where to Post
A photo on your phone is useless. It needs to be seen.
- Google My Business (GMB): This is the #1 place. Upload updates weekly. When someone searches “Plastering contractor,” Google shows the listing with the most photos. It improves your SEO ranking.
- WhatsApp Status: Your contacts (builders, architects, friends) are your warm leads. Post a daily “Site Update.” It keeps you top-of-mind.
- Instagram Reels: Create a simple 10-second Reel. “Day 1 (Brick)” -> Transition Effect -> “Day 4 (Gypsum White).” These are highly shareable and viral.
- The “Client update”: Send the Before/After collage to the client themselves. They will likely forward it to their family WhatsApp groups (“Look at our new house progress!”). They become your free marketers.
5. Creating “Case Study” Graphics
Don’t just post the raw photo. Use a free tool like Canva to add context.
- Add Text Overlay: “Project: Villa in Anna Nagar.” “Time Taken: 4 Days.” “Material: Kanish Elite.”
- Split Screen: Put the Before and After side-by-side in one image. This is easier for people to view than swiping.
- Watermark: Always add your logo and phone number on the image. If the photo goes viral or is shared, your contact details travel with it.
Frequently Asked Questions (FAQ)
Q1: Do I need client permission to post photos?
Yes, it is best practice. Usually, clients are proud to show off their home. Just ask, “Sir, the room looks great, do you mind if I post a photo on our business page?” Avoid photographing personal items or family members unless they agree.
Q2: What if the site is dark?
Bring a portable work light or use the “Night Mode” on your phone. But honestly, if the site is dark, the photo will never look premium. Wait for the electrical lights to be installed if natural light is missing.
Q3: Should I edit the photos?
Adjust brightness and contrast to make it look true-to-life. Do not use heavy filters or “fake” smoothing effects. If a client visits the site and sees it doesn’t match the photo, you lose trust.
Conclusion: Your Digital Portfolio
In the past, a contractor’s reputation was what people said about him. Today, it is what people see about him. By building a disciplined habit of documenting your work, you build a digital asset library that works for you 24/7. At Kanish Plasters, we provide our franchisees with templates and guides to ensure their photos look as professional as their walls.